Solid Hardwood Floor Installation Guide
Are you considering installing solid hardwood floors in your home? With the right tools, materials, and know-how, it can be a rewarding do-it-yourself project. Whether you’re looking to enhance the beauty of your space or increase its resale value, a well-installed hardwood floor can make a significant impact.
Before you start the installation process, it’s crucial to have a thorough understanding of the different installation methods, considerations for your subfloor, and the type of wood flooring you choose. This comprehensive guide will walk you through the steps and techniques involved in installing solid hardwood floors, ensuring a successful and long-lasting result.
Key Takeaways:
- Choose the right installation method based on your subfloor type, budget, and the specific type of wood flooring you have chosen.
- Consider factors such as skill level and budget when selecting the install method for your solid hardwood floor.
- Ensure proper preparation of the space, including removing baseboards, leveling the subfloor, and marking the location of floor joists.
- Familiarize yourself with the specific guidelines for acclimating the hardwood and protecting the floors and subfloors.
- Depending on your chosen installation method—glue-down or nail-down—follow the recommended techniques and finish the installation with baseboards and trim.
Choose Your Install Method
When it comes to installing solid hardwood floors, choosing the right installation method is crucial. Your choice should be based on factors such as your subfloor type, budget, and the specific type of wood flooring you have selected.
There are three main install methods to consider:
- Glue-Down: This method is commonly used for engineered hardwood flooring and involves spreading adhesive and securely clicking the panels together. Glue-down installation is suitable for subfloors like cement or tile. It offers stability and durability, making it a popular choice for many homeowners.
- Click-Lock: Click-lock installation is known for its ease and convenience. It involves interlocking the panels without the need for nails or glue. This method is commonly used for subfloors like cement or tile. Click-lock floors are easy to install and can be an excellent choice for DIY enthusiasts.
- Nail-Down: Nail-down installation is commonly used for solid wood flooring. It requires using nails or cleats to secure the boards to the subfloor. This method provides a permanent installation and is especially suitable for wood subfloors. While it may require more skill and tools, nail-down installation offers a traditional look and feel.
When selecting your install method, consider your skill level, budget, and the specific requirements of your solid hardwood floor. Each method has its advantages and considerations, so choose the one that best suits your needs and preferences.
General Tips for Installing Hardwood Floors
Before you embark on the hardwood floor installation process, there are some general tips and guidelines that can help ensure a successful project. Paying attention to these details will help you achieve a beautiful and long-lasting result. Here are some key tips to keep in mind:
- Start from the straightest, longest wall: When laying out the hardwood flooring, begin installation from the wall that is the straightest and longest in your space. This will help create a clean and symmetrical look.
- Install perpendicular to the floor joists: It is important to install the flooring perpendicular to the floor joists for maximum stability and support. This will help prevent the floorboards from sagging over time.
- Ensure enough flooring: Before you start the installation, make sure you have enough hardwood flooring to cover your entire space. It’s always a good idea to purchase some extra material to account for any mistakes or cutting allowances.
- Acclimate the hardwood: Hardwood flooring needs to acclimate to the room’s temperature and humidity before installation. Follow the manufacturer’s recommendations regarding acclimation time, typically around 48 hours.
- Level and smooth subfloor: Before installing hardwood flooring, it’s essential to ensure that the subfloor is level and smooth. Any irregularities in the subfloor can affect the stability and appearance of your hardwood floors.
- Sturdy subfloor: A sturdy subfloor is crucial for the proper installation of hardwood flooring. Make any necessary repairs or reinforcements to ensure that the subfloor can support the weight of the hardwood and withstand everyday use.
- Safety precautions: During the installation process, it’s important to prioritize safety. Wear appropriate protective gear, such as goggles and knee pads, and use caution when handling tools and equipment.
By following these general tips, you’ll be well-prepared to tackle the hardwood floor installation process and create a beautiful new floor for your space.
Prep the Space
Properly preparing the space is crucial for a successful hardwood floor installation. To ensure a smooth and seamless installation process, follow these important steps:
1. Remove Baseboards
Prior to installing your hardwood floors, it’s necessary to remove the baseboards. This will provide a clean and professional finish, allowing the flooring to be installed flush against the walls.
2. Level and Smooth the Subfloor
An uneven or bumpy subfloor can cause issues with the installation and the final appearance of the hardwood floors. Take the time to level and smooth the subfloor, removing any imperfections or debris, to ensure a level surface for the flooring.
3. Mark the Location of Floor Joists
Locate the position of the floor joists in the subfloor and mark them. This will help guide the installation process and ensure that the flooring is properly secured for stability and longevity.
4. Use Underlayment or Moisture Inhibitor
Underlayment or moisture inhibitors are essential for protecting the flooring and subfloor from moisture and creating a more comfortable and stable surface. Consult the specific guidelines for your hardwood flooring and subfloor type to determine the appropriate underlayment or moisture inhibitor to use.
5. Consider Hardwood Floor Acclimation
Hardwood floor acclimation is the process of allowing the flooring to adjust to the room’s temperature and humidity. This helps prevent issues such as warping and shrinkage after installation. Follow the manufacturer’s recommendations for acclimation time and conditions.
6. Follow Guidelines and Recommendations
Always refer to the specific guidelines and recommendations provided by the manufacturer of your hardwood flooring and the type of subfloor you have. Following these instructions will ensure a successful installation and help maintain the quality and longevity of your floors.
By properly prepping the space before installing your hardwood floors, you can ensure a smooth and durable finished result that will enhance the beauty and value of your home.
| Preparation Steps | Description |
|---|---|
| Remove Baseboards | Take out the baseboards to allow for a clean and flush installation. |
| Level and Smooth the Subfloor | Ensure the subfloor is even and free from imperfections for a smooth finish. |
| Mark the Location of Floor Joists | Identify and mark the floor joists to guide the installation and ensure stability. |
| Use Underlayment or Moisture Inhibitor | Protect the flooring and subfloor from moisture and provide added comfort. |
| Consider Hardwood Floor Acclimation | Allow the hardwood flooring to adjust to the room’s temperature and humidity. |
| Follow Guidelines and Recommendations | Adhere to the manufacturer’s instructions for a successful installation. |
Glue-Down Install Method
The glue-down install method is a popular choice for installing engineered hardwood flooring. It offers a secure and durable installation by spreading flooring adhesive and clicking the panels together, securing them with glue. This method is particularly suitable for subfloors like cement, tile, or floors with radiant heat.
When using the glue-down method, it is crucial to follow the recommended guidelines for spreading the adhesive and installing each row of flooring. This ensures a proper bond and stability. Additionally, using spacers during installation helps maintain the proper expansion gap, allowing the floor to naturally expand and contract with changes in temperature and humidity.
Step-by-Step Glue-Down Installation:
- Prepare the subfloor by ensuring it is clean, dry, and level.
- Apply the appropriate flooring adhesive according to the manufacturer’s instructions. Spread the adhesive using a trowel, making sure to cover the entire surface evenly.
- Begin installing the first row of flooring, clicking the panels together and applying gentle pressure to secure them to the adhesive.
- Continue installing subsequent rows, ensuring tight and seamless joints between each panel.
- Use spacers along the walls to maintain the necessary expansion gap. These spacers will be removed once the installation is complete.
- Allow the adhesive to fully cure, following the manufacturer’s recommended drying time.
- After the adhesive has cured, install baseboards and transition strips to give the installation a polished and finished look.
By following the glue-down install method correctly, you can achieve a beautiful, long-lasting hardwood floor that enhances the aesthetic appeal of your space.
| Advantages of Glue-Down Install Method | Considerations for Glue-Down Install Method |
|---|---|
|
|
Nail-Down Install Method
The nail-down install method is a popular choice for solid hardwood flooring installation on a wood subfloor. It provides a secure and permanent solution for homeowners looking to enhance their spaces with the timeless beauty of solid wood floors.
Here’s a step-by-step guide to the nail-down install method:
- Start by aligning the first board with the layout line on your subfloor. This will serve as your reference point for the rest of the installation.
- Using a flooring nailer, secure the boards in place by driving nails through the tongue or face of the boards. This helps ensure a sturdy and level installation.
- Drill pilot holes through the tongue of each board before nailing them down. This helps prevent splitting and ensures a smooth installation.
- After securing each row, lock the boards in place by tapping the tongue with a rubber mallet. This ensures a tight fit between the boards.
- For the last few rows, face-nail them to secure them in place. This may require pre-drilling holes to prevent splitting and achieve a seamless finish.
- Fill any nail holes with wood putty that matches the color of your hardwood flooring. This helps create a seamless appearance.
- Finally, complete the installation by installing baseboards and trim to cover the expansion gap along the perimeter of the room. This adds a finishing touch to your newly installed solid wood floor.
By following these steps, you can achieve professional-looking results with the nail-down install method for solid hardwood floor installation.
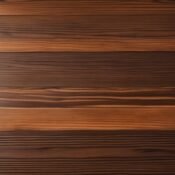
Determine Plank Width
When it comes to hardwood flooring, the width of the planks can significantly impact the overall aesthetics of the space. The choice of plank width depends on individual preferences and the size of the room. While narrower planks can create a traditional and refined look, wider planks are often associated with luxury and provide a sense of grandeur.
Wide-plank hardwood flooring has gained popularity in recent years, as it can add a touch of elegance to any home. However, it is essential to consider the natural expansion and contraction of the wood when opting for wider planks. With wider planks, the seams between the boards may become more prominent as the wood adjusts to changes in humidity and temperature.
When determining the plank width for your hardwood flooring, it is crucial to find the right balance. Consider the size of the room and the desired aesthetic. In smaller spaces, narrower planks can make the room appear more spacious, while wider planks can make a larger room feel cozy and inviting.
Ultimately, the plank width is a personal choice that should align with your style and preferences. Whether you opt for narrow or wide planks, hardwood flooring adds warmth and beauty to any space.
Section 8: Tools and Materials
Before you embark on your hardwood floor installation project, it’s essential to gather all the necessary tools and materials. Having the right equipment on hand will ensure a smooth and successful installation process. Below is a list of commonly used tools and materials for hardwood floor installation:
Tools
- Pneumatic flooring nailer
- Drill
- Hammer
- Saw
- Spacers
- Tape measure
- Wood putty
Materials
- Hardwood flooring
- Underlayment
- Adhesive (if applicable)
- Moisture barrier
- Nails or staples (if using the nail-down method)
- Transition strips
- Baseboards
The specific tools and materials required may vary depending on the type of hardwood flooring you are installing. Consult the instructions provided with your flooring to ensure you have everything you need for a successful installation. Remember to prioritize safety and follow all manufacturer guidelines when using tools and materials.
Conclusion
Installing solid hardwood floors can be a rewarding DIY project if you have the right tools, materials, and knowledge. Whether you choose to go with a glue-down, nail-down, or click-lock installation method, it’s crucial to carefully consider the guidelines for your specific hardwood flooring and subfloor type. It’s also important to take the time to properly prepare the space and acclimate the hardwood to ensure a successful installation.
Following the recommended installation techniques, such as starting from the straightest, longest wall and installing perpendicular to the floor joists, will help you achieve a professional-looking result. Remember to use spacers to maintain the proper expansion gap and finish the installation by installing baseboards and transition strips. If you encounter any difficulties or feel unsure about any step, don’t hesitate to seek professional help.
Once your solid hardwood floor is installed, you can enjoy its beauty and durability for years to come. Hardwood floors bring warmth and elegance to any room, and their natural variations in color and grain add character and charm. Proper maintenance and regular cleaning will help preserve their beauty and ensure they last a lifetime. So go ahead, take pride in your DIY installation, and embrace the timeless appeal of solid hardwood flooring.
FAQ
Can I install solid hardwood floors myself?
Yes, installing solid hardwood floors can be a rewarding DIY project if you have the right tools, materials, and knowledge.
What factors should I consider when choosing an installation method?
Factors to consider include your subfloor type, budget, and the specific type of wood flooring you have chosen.
What are some general tips for installing hardwood floors?
Start installing from the straightest, longest wall, install the flooring perpendicular to the floor joists, and make sure you have enough flooring for your space.
How do I prepare the space before installing hardwood floors?
Properly preparing the space involves removing baseboards, ensuring the subfloor is level and smooth, and marking the location of the floor joists.
What is the glue-down install method?
The glue-down method involves spreading flooring adhesive and clicking the panels together, securing them with glue.
What is the nail-down install method?
The nail-down method involves using a flooring nailer to secure the boards in place on a wood subfloor.
How do I determine the width of the planks for my hardwood flooring?
The width of the planks depends on personal preference and room size, but it’s important to consider the expansion and contraction of the wood.
What tools and materials do I need for hardwood floor installation?
You may need a pneumatic flooring nailer, drill, hammer, saw, spacers, tape measure, and wood putty, among other tools and materials.
Any final thoughts on hardwood floor installation?
Follow the specific guidelines for your flooring and subfloor type, and don’t hesitate to seek professional help if needed.
Recent Posts
Seattle Carpet Cleaners Discussion Forum
Seattle Carpet Cleaners Discussion Forum
Seattle Hardwoods: Premium Wood Flooring & Lumber
All Categories
Become A Preferred Partner
A great partnership for qualified vendors only